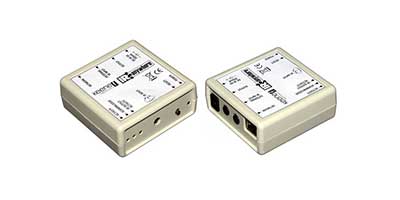

SET UP BWS Systems HA bridge for use with Keene Kira products
At the time or writing HA Bridge is an absolutely excellent FREE home automation program. We have tried a few and so far this is street ahead of the rest. And it can be used with most of the Keene 'Kira' range of products.
The HA Bridge program must have taken someone a lot of time to produce, if you use it and it does what you want we would strongly recommend that you make a donation to BWS Systems for theiir time and effort. There is a link at the bottom oftheir home page.
https://github.com/bwssytems/ha-bridge
Assumptions
you have the HABridge panel open in a browser in front of you.
It is saving and loading correctly and if using Linux permissions have been set
See the end of this document for a crib sheet on setting up a Raspberry Pi 3 with HA Bridge.
Example
Turn on SKY box and TV.
(you have a Kira 128 or KiraCC with the IR codes to turn on the Sky box stored into location 1 and the IR code to turn on the TV stored into locatio 21. kira IP address is 192.168.100.123 and the udp data port is the default of 65432)
On HA Bridge click on add/edit
You are presented with an unpopulated device page
Name set to 'SKY TV' (or something easy for Alexa to recognise)
Device type UDP
in 'ON' items...
type UDP Device
Target Item udp://192.168.100.123:65432/cmdT001
Content Type text/plain
click 'add to add it
In the 'ON' items a second line appears
in the new line
type UDP Device
Target Item udp://192.168.100.123:65432/cmdT021
Content Type text/plain
and again click add
At the top of the page click the green 'update bridge' button
You will see a line of buttons with the name SKY TV
The 'ON' button relates to the 2 codes you just entered. The dim and off were not configured here.
Click the 'ON' button and the Sky box and TV should turn on. Assuming of course that the Kira is there and set up correctly.
Amazon echo (dot)
Now tell Alexa 'Alexa find my devices' it will take around 30 seconds but should come back with the devices that you have set up, i.e SKY TV
You should now be able to say 'Alexa switch on SKY TV
and as she is a good girl she will do it.
OTHER codes you can store
You can also use full IR code strings the codes do not have to be stored so a stadard Kira can be used you do not have to have one that can store codes.
eg for SKY button 1 (standard Kira)
udp://192.168.100.45:65432/K 241e 0A6A 0378 01BC 01BC 01BC 01BC 01BC 0378 01BC 0378 0378 01BC 01BC 01BC 01BC 01BC 01BC 01BC 01BC 01BC 01BC 01BC 01BC 01BC 01BC 01BC 0378 0378 01BC 01BC 01BC 01BC 01BC 01BC 01BC 01BC 01BC 01BC 0378 01BC 01BC 0378 0378 0378 01BC 01BC 01BC 01BC 01BC 01BC 01BC 01BC 01BC 01BC 01BC 01BC 01BC 01BC 0378 2000
when you click 'add' to add the button a second line appears if you enter the target info the another botton eg 2 you can also enter a delay to simulate a sequance of button preesses say 200 (mS)
button 2
udp://192.168.100.45:65432/K 241e 0A6A 0378 01BC 01BC 01BC 01BC 01BC 0378 01BC 0378 0378 01BC 01BC 01BC 01BC 01BC 01BC 01BC 01BC 01BC 01BC 01BC 01BC 01BC 01BC 01BC 0378 0378 01BC 01BC 01BC 01BC 01BC 01BC 01BC 01BC 01BC 01BC 0378 01BC 01BC 0378 0378 0378 01BC 01BC 01BC 01BC 01BC 01BC 01BC 01BC 01BC 01BC 01BC 01BC 0378 0378 01BC 2000
Similarly for a third button (button 3) again with a 200mS delay
udp://192.168.100.45:65432/K 241e 0A6A 0378 01BC 01BC 01BC 01BC 01BC 0378 01BC 0378 0378 01BC 01BC 01BC 01BC 01BC 01BC 01BC 01BC 01BC 01BC 01BC 01BC 01BC 01BC 01BC 0378 0378 01BC 01BC 01BC 01BC 01BC 01BC 01BC 01BC 01BC 01BC 0378 01BC 01BC 0378 0378 0378 01BC 01BC 01BC 01BC 01BC 01BC 01BC 01BC 01BC 01BC 01BC 01BC 0378 0378 01BC 2000
This would change a SkyHD box to channel 123
Other Kira devices you can use
Relays ON / OFF in a KiraCC or IPMSW1
put the code to turn ON the relay into the ON button and put the code to turn off the relay into the OFF button
Now you could now say Alexa turn ON xxxxx and Alexa turn OFF xxxxx
KiraQ
You can send the full IR codes much like a standard Kira to a KiraQ and that will control the SKY box.. You can also do udp://xxx.xxx.xxx.xxx:65432/cmdCTQ192.168.100.123 to set the SKY box type to Q and the SKY box IP to 192.168.100.123 xxx.xxx.xxx.xxx is the IP address of the KiraQ
Setting up a Raspberry Pi to use HA Bridge
Assumptions
Fresh Out of the box operating system, Network has been set up and that java is installed (should already be installed)
Preparation
Copy ha-bridge.jar file to a USB memory stick along with a text file containing the start text (See below). Once it has the file plug this memory stick into the Pi.
Use either Wireless OR wired Ethernet.
Make a note of the IP address.
Download the latest ha-bridge jar file from BWSSystems
Use PCManFM to create a new directory in home/pi called habridge
so you now have home/pi/habridge
Copy the jar file to that directory
Now open Terminal to create a folder in the habridge directorycalled data.
pi@raspberrypi:~ $ cd /home/pi/habridge
pi@raspberrypi:~ $ mkdir data
You need to create a new service file for the habridge program so that it can be started and stopped correctly. This needs to be done via the command line using Terminal.
use the terminal editor to create the new service file as below.
pi@raspberrypi:~ $ cd /etc/systemd/system
pi@raspberrypi:~ $ sudo nano habridge.service
(copy text below to the new file - make sure jar version matches the file you downloaded 4.1.4 at time of writing) You can copy / paste this from the USB memory stick. PCManFM to nano using right click.
[Unit]
Description=HA Bridge
Wants=network.target
After=network.target
[Service]
Type=simple
ExecStart=/usr/bin/java -jar -Dconfig.file=/home/pi/habridge/data/habridge.config /home/pi/habridge/ha-bridge-4.1.4.jar
[Install]
WantedBy=multi-user.target
click ctrl X and answer Y (return) to save
Now reload services
pi@raspberrypi:~ $ sudo systemctl daemon-reload
start habridge service
pi@raspberrypi:~ $ sudo systemctl start habridge.service
set to start at boot.
pi@raspberrypi:~ $ sudo systemctl enable habridge.service
now check it is running
pi@raspberrypi:~ $ systemctl status habridge.service
or
pi@raspberrypi:~ $ systemctl is-active habridge.service
Finally you need to allow read /write permisions for all to the HABridge directory
pi@raspberrypi:~ $ cd /home/pi/habridge
pi@raspberrypi:~ $ sudo chmod -R 666 data
Assuming all is OK
Got to another machine on your network
Start a browser and type http://xxx.xxx.xxx.xxx:80 into the address bar of the browser
Where xxx.xxx.xxx.xxx is the IP adress of your module, (you noted itearlier)
You should see the HA Bridge start page
Before doing anything else you need to change the save location of the database
Click on bridge control.
and change the save location of the dadatbase to the habridge directory
/home/pi/habridge/data/device.db
Now everything will be nice and tidy in the one location
Try adding a test device and check that everything saves OK.
Finally Check permissions with
pi@raspberrypi:~ $ sudo ls -l /home/pi/habridge/data/device.db
pi@raspberrypi:~ $ sudo ls -l /home/pi/habridge/data/habridge.config
They should both come back as rw-rw-rw.
If not...
pi@raspberrypi:~ $ sudo chmod /home/pi/habridge/data/device.db
pi@raspberrypi:~ $ sudo chmod /home/pi/habridge/data/habridge.config