Advanced mode setup
In this mode each module will be connected to your wireless network. Check that you have good wireless signal strength in the areas you wish the modules to be located. IMPORTANT - only 2.4GHz networks are supported, the Kira modules cannot connect to a 5GHz network.
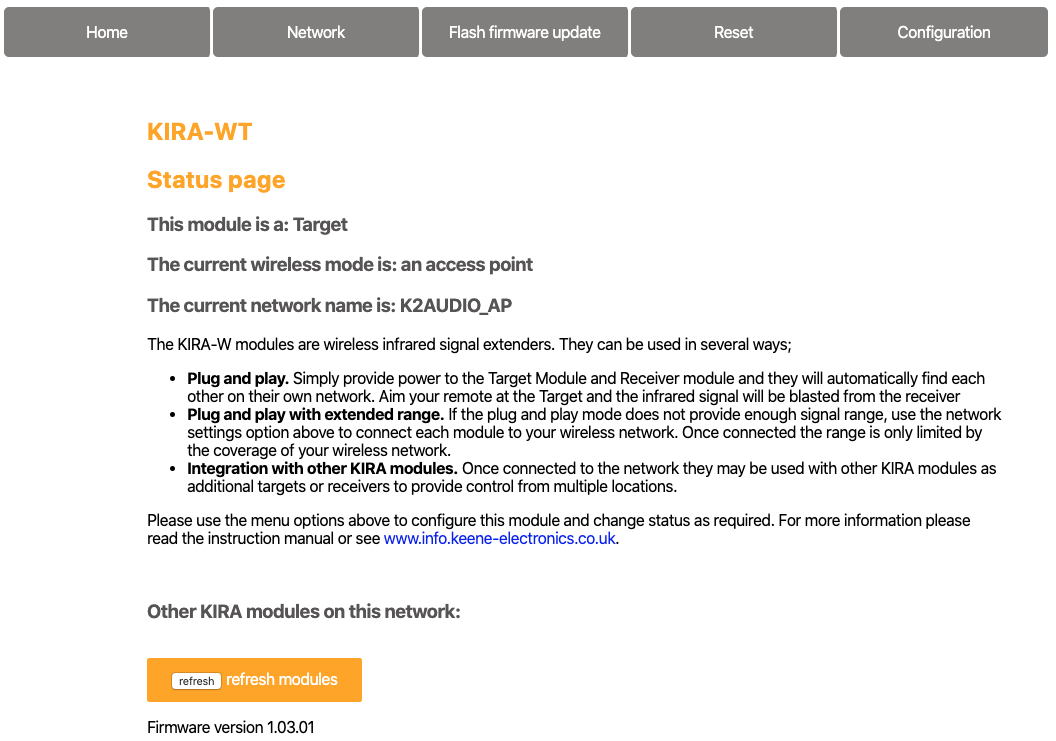
Step 1 - connect the Transmitter
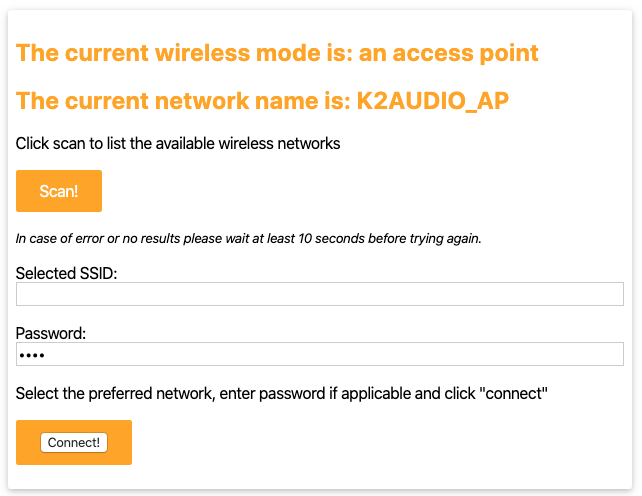
Scan for and connect to the wireless network called K2AUDIO_AP. The default password is K2AUDIO! (all caps). Once connected enter 192.168.4.1 into your browser address bar. You should now be able to see the web page for the Transmitter module.From the top menu select “network” and click to scan for available networks. Once the list is populated select your wireless network, enter the password then click “connect”. After a few seconds you should see a success message and the newly assigned IP for the Transmitter module. Make a note of this IP address.
Step 2 - connect the Receiver
You now need to connect the Receiver module to the same network. To do this press and hold the reset button for a couple of seconds then release and immediately depress the button again for a further five seconds. release the button and the module will reboot. Scan for and connect to the wireless network called K2AUDIO_R_AP. The default password is K2AUDIO! (all caps). Once connected enter 192.168.4.1 into your browser address bar. This should bring up the web page for the receiver module.Select the network tab and scan for available networks. Select your wireless network and enter the password then click “connect” After a few seconds you should see a success message and the newly assigned IP for the Transmitter module. Make a note of this IP address.
Both modules will now be connected to your wireless network. Accessing the web page for each module will give you more information, show the status of other modules on the network and allow you to change some parameters such as host name etc.
Important
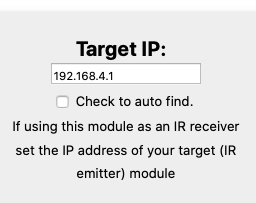
The receiver makes frequent checks to ensure that the transmitter can be found. If the receiver is installed on a different remote network to the transmitter then please un-check the Target IP box (checked by default). If this is left checked then the receiver will disconnect from the network after a number of failed attemps to locate the Transmitter.
It is recommended to assign the modules a static IP address so that you can always access them at the same address. Please see the configuration section for more details.
Understanding the status/IP activity LED’s
These perform two basic checks for you. If these LED’s perform a continuous rapid flash it means they cannot connect to a network. If these LED’s perform a rapid triple flash this means they are successfully connected to the network but are unable to find an appropriate module to connect to.