Learning IR Code
The basic KIRA modules are capable of storing up to four IR codes. The module can then be remotely commanded to blast these codes via the browser "send IR Codes" menu. (For modules with greater code storage capacity please see the KIRA128).
The basic procedure to learn an IR code is capture, test (optional but sensible) and save, although as you’ll see there are plenty of options.
First of all you must check that the module IP address is set to that of the IR Anywhere module you wish to use. This should be shown in the status window at the bottom of the page as below.

If the module IP is NOT displayed then open the options screen (File>Options) and look at the section below.
Select the required IP from the drop-down, or use “add” to add it to the list if it’s not already there. You can also use the “find modules” button to ping the network and open a pop-up box to tell you the IP addresses of any modules found.
Note1: for this procedure the module you are capturing from MUST be configured as a receiver or stand-alone and NOT as a target.
Note2: you must have selected (and saved) the “attempt find and send to PC” in the “options” tab of the IR Anywhere module web page. You can also do this by clicking the "send to this PC" button below "Set this PC as the destination for received IR codes".
Note 3: you can check that the module has correctly found the PC by clicking the “Configuration” tab and looking at the “Computer MAC & IP Address”. If the MAC address is showing as all FF’s then it has not successfully communicated with the computer, in which case check all your IP addresses and firewall settings.

Now click on the green “learn” button and it should turn to a red “stop” button.
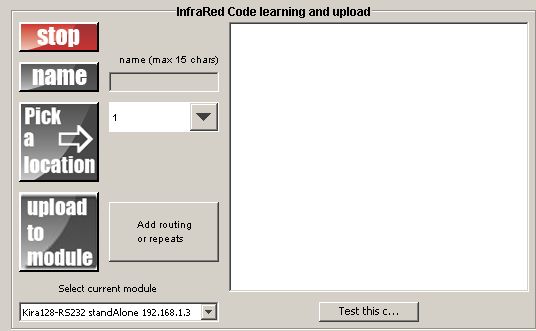
The program is now ready to capture. Aim your remote control at the IR sensor on the module (see Learning IR code tips opposite) and press the button you wish the module to learn. As soon as the program has captured one complete string of code this will be displayed in the code window.
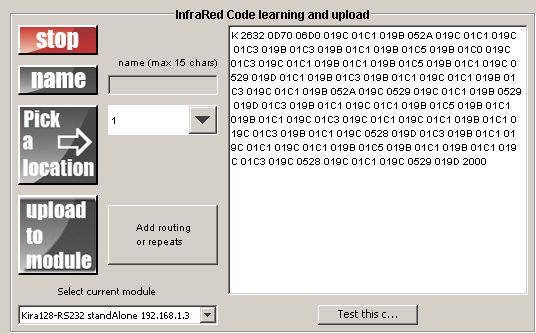
Now click the "stop" button. At this point you can test the code, save the code or press "learn" to clear the screen and start over again.
To test the code, change the target IP address to match that of your target module (the IR emitter), or if using just one module change the status from receiver to target. If all is well you will see “ACK” appear in the reply window to acknowledge that the module has received the code. Your equipment should have responded the same as if you’d pressed the button on the remote control.
If this is the case then you can consider it a successful capture. If it works sometimes and sometimes not then you can first of all try clicking the "tidy this code" button.This applies averaging to try and smooth out any large variations. If that still doesn't work then try capturing again.
If the code is OK then enter a suitable name (e.g. DVD menu) in the Save/Load code file name box and click append name and save.
You can also click "upload to module" and upload the code to be stored within one of the 4 memory locations inside the Module. The name you gave it will then become available as a listed command within the IR Anywhere web page.
The "save code as is" is not normally used unless you are developing your own software applications.
You'll notice that the given name also appears in the code window followed by a "K". (See Learning IR code advanced for a full explanation as to why).
Repeat as required for all the IR codes you wish to learn.